- You are here:
- Home »
- Blog »
- Natural Solutions »
- How to Grow Your Seedlings from Seeds 101- Part 1
How to Grow Your Seedlings from Seeds 101- Part 1

Save Money – Improve Selection and Quality
While winter cold still envelops us, people that garden in the spring already know that it is time to begin thinking about getting ready for your spring gardening. After the New Year, seed catalogs start arriving and by February we are starting to grow tired of winter and begin to welcome warmer weather once again.
Maybe this year you’d like to try a variety or vegetable that never appears in the seedling trays at the local garden center. Perhaps, one of the heirloom varieties.
The problem is all you usually ever see are the same standard tomatoes. eggplants and peppers. Maybe a few trays of strawberries, cabbage, yellow squash, zucchini and possibly a few others.
However, there are a lot more selections available not only from online sources but even in the big box garden centers like Home Depot. But you wonder, they look great but how do I grow seeds into viable seedlings?
Gather Your Ingredients
In this post, we are going to take a careful look at how to grow your plants from seeds. In some ways, it is like cooking a dish from a recipe.
- You need to get all of ingredients you will need.
- Then, assemble them into a usable array- using the best quality ingredients affordable.
- Next, put all those ingredients into your recipe in the recommended way.
- Finally, keep a watch on the cooking (growing in this case) process until the dish comes together to reach your intended end product.
We’ll provide you with instructions, a video and resources for everything you will need. Once you get everything gathered you will find that it is not as difficult as you may have thought.
Advantages of Plants from Seeds
There are some key advantages to growing plants from seeds like:
- A much larger selection of vegetables and vegetable varieties
- It’s Cheaper (once the initial investment in some basics has been made)
- You have Better quality control (You select the best seeds and growing matter)
- It’s more fun (You, and your children, get to see the whole process from the seed to the table, controlling much of it along the way.)
Inspiration for This Post
I drew the starting point outline for many of the suggestions from a video I ran into online which came from a site called gardenpool.org. Garden Pool is a non-profit organization begun in 2009 by Dennis McClung. I am using many of the suggestions from this video myself as well in case you wondered.
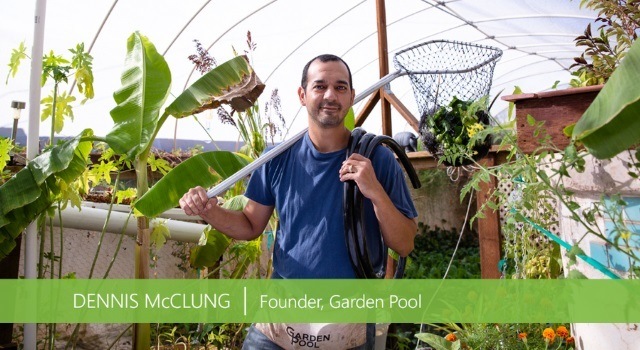
Dennis invented the Garden Pool system in his backyard, a closed-loop, food-producing system that uses 98% less water than traditional agriculture. The Garden Pool system went viral. His organization evolved from a grassroots movement into an international nonprofit dedicated to researching and teaching sustainable ways of growing food.
The seed starting video can be seen here:
Getting Started
Growing seedlings is like following a recipe. The first thing you need to prepare a dish, so that you can follow the instructions more easily, is to gather the materials necessary to make the finished dish.
In this part one video we are going to concentrate on what you need with some optional suggested items depending on your set-up.
First, let’s start with a list of materials which you will need and possibly not need.
- Growing trays- with seedling cell inserts and dome
- Growing medium – soil or soil-like growing medium
- Seeds – organic or best quality (We’ll talk about creating your own in this post for next time around.)
- Growing Tray Mat Warmer and thermostat
- Growing Light- and timer (optional but recommended)
- Portable Green House System (optional)
Seeds
If you are going to grow seedlings, you first need some seeds. You can get seeds from a number of companies online including True Leaf , which has non-GMO, organic and heirloom seeds as well as most of the other materials you will need to get started with and continue your seedling development (also good for microgreen seeds which I discussed in another post).

Another source is Amazon which has a wide variety of both heirloom and organic seeds. These two sources should be enough to get you started with some high quality seeds and variety.
If you want more exotic or unusual varieties, you can also search online for other seedling companies like Baker Creek Heirloom Seeds, Eden Brothers and Annie’s Heirloom Seeds.
Keep in mind that you can seed save for your next growing season from this one which makes next years seeds basically free. We’ll discuss that issue in part 2 on this topic.
Growing Trays
True Leaf market has pretty much all you need for seedling trays. The recommended size is 10 X 20 which is called a 1020 tray.
Amazon also has a wide selection of trays as well. Keep in mind you will need 3 parts for seedlings:
- One part is the bottom tray in which your water for the seedlings will be added. It needs to be solid and without holes, of course.
- Another part is the seedling inserts – These come in a number of compartment sizes from 72 cell to 50, 36, 32 and on down. Dennis McClung recommends 72 cell size. Select what you think will work best for your needs.
- The third and final but important part is the dome. Domes are available on Amazon and at True Leaf. Domes help protect and nurture your seedlings during the initial growing stages. Vented domes work best as a lot of moisture will gather and keep your seedlings too moist during with unvented domes.
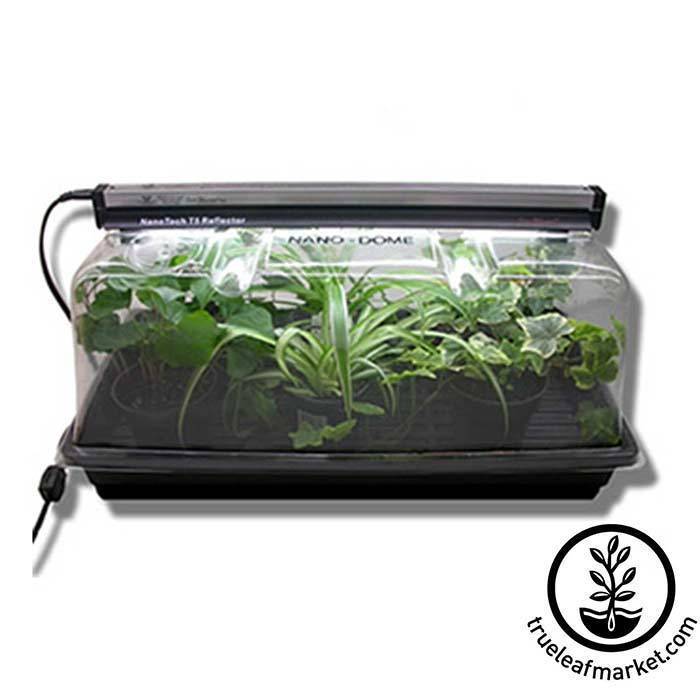
You can also purchase full kits at both of the above sites such as the kit below which you can get from True Leaf.
The light, the 10 x 20 tray and the dome are included with this kit. However, you will also need the seedling insert trays which were discussed above.
You can also purchase the trays as above and purchase a growing light stand separately which we will talk about next.
Lighting
A light is optional, but strongly suggested. If you have a well lighted window area in your living location that gets real sunlight during the day, then a growing light may not be necessary. However, growing lights are recommended for seedlings simply because sunlight can not only be unreliable and difficult to work into your living set up but also may be too intense and burn up your seedlings before they have a chance to develop.
Growing lights make your seedling growing much more reliable as well as allowing you to set up your seedlings in a location without concern over available light.
There are two kinds of growing lights – red and blue. The recommended lighting is the blue type. The reason for that is the blue light imitates the light of spring which is the type of light that encourages leaf growth and seedlings. Red light is a fall type of light simulation.
The correct blue light for each 1020 tray is a 24″ T5 light which casts off a color temperature of 6,400K lumens (which simulates springtime light) The “T” stands for tubular and the “5” means 5/8″ in diameter.
Amazon offers a one and two light stand alone lighting set up which will do the trick very nicely as far as your lighting needs go which is featured below:
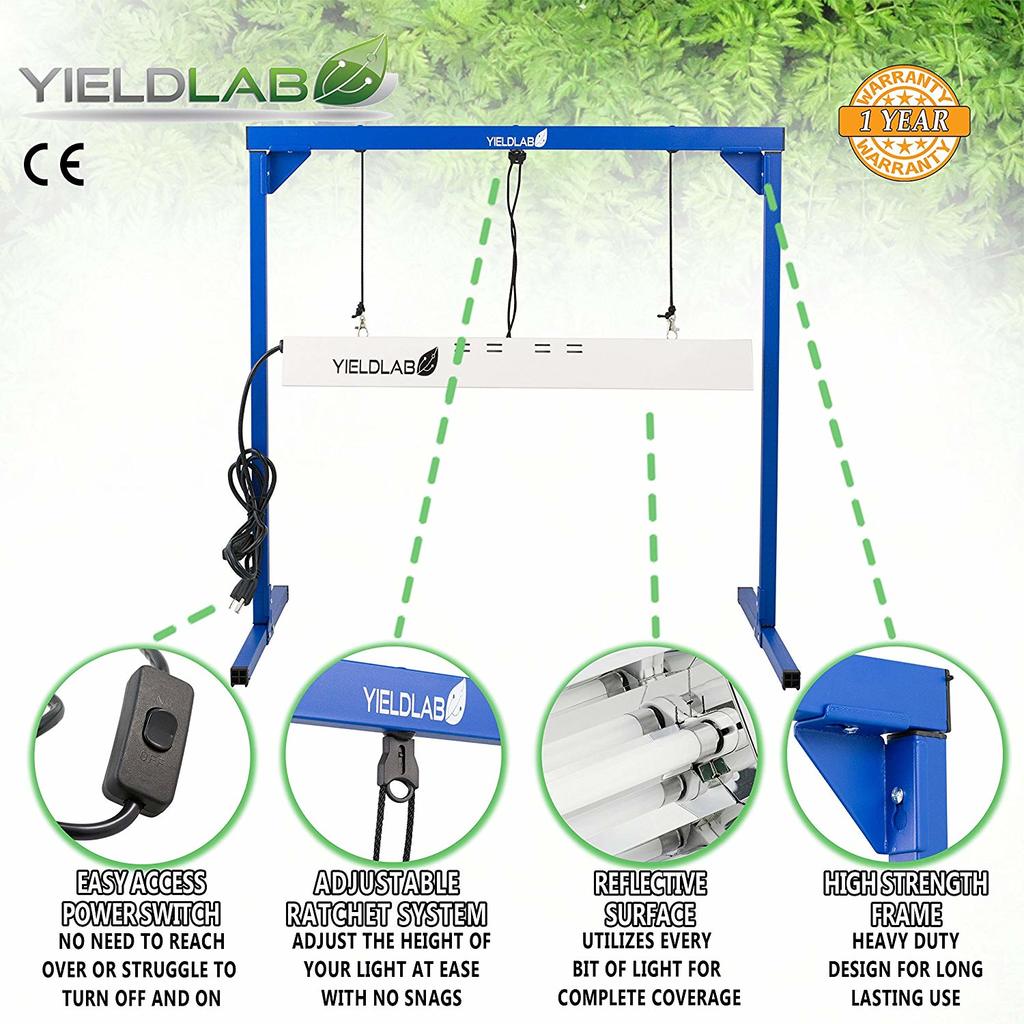
The two light kit is only about $7 more than the one bulb kit. Both fit 2 foot fluorescent bulbs.
You can also buy individual growing lights. Dennis hangs them with “S” hooks. You can also use outdoor mounting strips or another method. This strategy would be used with a portable shelved greenhouse system mentioned in the video.
The portable greenhouse is an option that will increase your growing space and efficiency. I would suggest it for more serious gardeners with more growing space and a higher need for seedling development. It can also be used for the micro green growing process covered in another post.
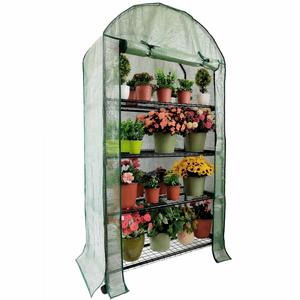
A growing light can be added to each shelf. These can be purchased on Amazon. An example of a portable green house is pictured here.
There are others available including walk in models with 3 tiers and 12 shelves for a very reasonable investment.
Heating Mat and Thermostat
A very important tool to raise good seedlings is a heating mat, particularly if you are starting them during colder times. The heating mat helps keep the water and growing medium temperature at the optimum level for growing seedlings.
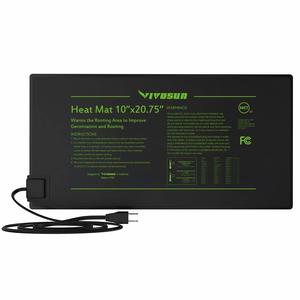
You fill the growing tray with water and give it good light but if the water and growing medium stays cool the seedlings will not grow as quickly nor as healthy.
An electric heating mat placed underneath your tray solves that problem. There are non-electric mats as well which will keep the tray from getting too cool from ground temperatures if you locate on the floor or on a cooler surface.
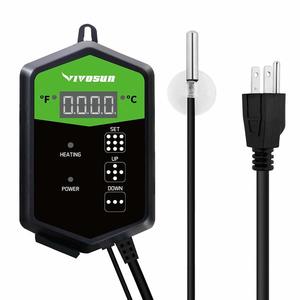
A thermostat will help the electric mat to automate the temperature regulation without concern on your part. I purchased one to go along with the mat after reading reviews that seedlings were burnt up without one from a number of reviews. They are not costly, The one I purchased (pictured here) was a breeze to set up and has been working without issues thus far.
Growing Medium
Of course, one of the most important aspects of any seedling development process is the medium you use to grow your seedlings in. That is you put your seeds in. Most of assume that would be soil or a soil mix of peat and soil or peat only.
However, Dennis McClung introduced another medium into the seedling growing process I had never even considered called coconut coir (also called pith). It is essentially a by-product of the process of making coconut shells into fiber to be used to make rugs, mats and other woven products made from coconut shells.
Advantages:
- It is mildew and mold resistant and repels bugs, termites and other pests rather than attracts them like soil may.
- It is bio-degradable and anti-bacterial which helps keep your seedlings healthy
- It drains well so that your seedlings do not get over-saturated and water logged.
- It is a lighter soil texture which helps with seedling root development
- It is environmentally friendly. Unlike peat which is extracted from bogs and disturbs the natural environment. Coco coir is acquired as a by-product of coconut fiber production which are basically the fruit product of a coconut tree. The environment is not disturbed.
- It is inexpensive and can be reused. Hence, very cost effective.
Disadvantages
- 90% of the coco coir is acquired from Sri Lanka, according to Dennis. Some of the production facilities are near the ocean. There may be some excess salt in your coir if you do not buy horticultural grade.
If you decide to go with coir, the brick (pictured below) you receive will be rock hard. You can also purchase it already softened, but bricks are fine.
To separate your coir into a usable growing medium, soak your coir brick in a water bucket at room temperature or warm water for an hour- more or less.
You can speed up the process by breaking off parts as it softens. Some will separate in minutes once it begins to soak if you actively separate it as it softens. It depends on the density and dryness of the brick.
Once you have it all separated, you will need to allow it to dry. Coco coir is very absorbent which is another reason it makes a good planting base. It may take a number of days for it to fully dry contingent upon your home temperatures. In a sunny location, of course, it will dry faster.
If you have a pad warmer you can place it on the warmer to accelerate the drying process.
For a brick like the one pictured below use about 50-60 oz. of water. After soaking and separating, rinse it a bit and allow it to dry.
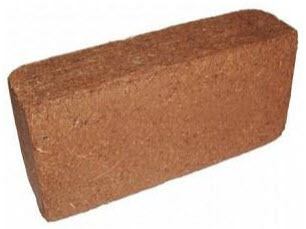
It will expand to about 8 times its brick size once soaked and dried. To give you some perspective on quantity, one 1.5 lb. brick as pictured will yield about two 1020 trays quantity of coir.
This will help you gauge your quantity. You can store any remainder in a plastic bag and use it as needed for the next tray of seedlings or microgreens if you are following the recommendations on that post.
There are a number of sources. If you need a smaller amount to start. Healthy Ranger has a smaller size of good quality coir to get you started at a very reasonable cost.
If you need a larger amount for seedlings and soil conditioning as well, then True Leaf or Amazon have larger size selections.
Coir can be re-used. It can also be put into the garden which serves the same function as peat in that it loosens up your soil while adding organic growing matter to the soil. One of the advantages of coir is that it has anti-bacterial properties so it will also help to protect your garden soil (and seedlings) from mold and unwanted bacterial invasions.
Soil As a Growing Medium
If you are using soil. Use high quality. It doesn’t need to be heavily fertilized as that may actually burn up your seedlings. If should, of course, be organic.
To be safe, it is suggested that you sterilize the dirt in the oven at 250 degrees for a couple of hours to kill any mold or harmful bacteria etc. that may be in your soil prior to the planting.
You also need to loosen up your soil up to allow for easy root development for your seedlings. Peat or coir will work well for this purpose. Use about 1 part peat or coir for 2 parts of soil.
Another suggested mix is 1 part organic soil – 1 part peat – 1 part coir. Remember to sterilize your soil and/or rinse your coir unless it is already guaranteed horticultural grade. It won’t hurt to rinse it anyway as a precaution against industrial salts, as it will dry quickly enough anyway.
Summary
OK, that may seem like a pretty good assemblage of ingredients. It just depends on how serious of an organic gardener you are. How much you value the quality of your end product.
You may already have some of these items already and thereby your initial investment may only be in seeds and a few of the other items like the coco coir.
You can not be sure of what you are getting if you are buying seedlings from your local big box store which many of us end up doing. In case you haven’t noticed, the cost of seedlings has been steadily rising, as well.
With this process, you control the quality by carefully selecting all of your seeds and the growing medium.
Your investment can be a one time investment, if all are treated well your materials can last for years. Another bonus is that you will also be able to harvest next years seeds as well which we will discuss in the next post in which we will cover how to put all of this together into a seedling growing process. It’s really not that difficult but will take a little bit of attention and timing. Let’s move on to the next part and have some fun.
Related Posts
Is Holistic Oral Care a Forgotten Part of Your Natural Health Treatment Plan?
Should You Take Drugs to Cure COVID-19?
Free Survival Nutrition Course – 8 Hours Plus PDF
What’s For Dessert? Superfood Fudge
8 Common Herbs With Amazing Health Benefits
Four, No-Cost, Natural Life Hacks for Creating a Healthier Emotional State
Wall Street Journal Investigation Finds Dumpster Trash Food and Supplements Being Sold as New
Tackling Obesity Begins with Awareness and Ends with Action
