- You are here:
- Home »
- Blog »
- Natural Solutions »
- How to Grow Your Seedlings from Seeds 101- Part 2
How to Grow Your Seedlings from Seeds 101- Part 2

The first part of this seedling recipe focused on the ingredients. This part will focus on how to put those ingredients together and make them work.
In order to grow good seedlings, you need the following ingredients consistently:
- A suitable growing medium
- A consistent source of light
- Regular watering
- Regulated temperature conditions
Should you lack any of the above, your seeds will not germinate and grow into seedlings successfully. If you lack any of the above, review the ingredients list in part 1. You will find the solutions for any of the above issues.
Assemble Your Trays
Assuming you have chosen an appropriate location, the first step is to assemble your seedling growing trays. Select the cell size you have chosen- 72 on down.

Note: Micro-greens can be grown without cell inserts. Use plastic beds with holes or slits to allow water to enter that fit the solid plastic bottoms. Generally, slitted or holed beds will fit the solid bottoms trays.
Place the tray on a mat or mat warming electric mat not on the cold floor. I found out the hard way already. Cold water will stunt or kill your seedlings.
Now, at this point, you can either fill them with water (Not to the top as the seedling cell insert will displace the water.) or fill them later after your cell trays have been inserted with the growing material.
Pour in about a half gallon of water into your tray reservoir- about 60 ounces or so. No need to overfill.
Do not use tap water because of the chlorine. You can let your water sit in a glass or clear container to let the chlorine evaporate out for a day or two if you only have tap water.
I suggest filling them with water first particularly if you are going to be using a heating pad. This way the pad can be turned on and bring the water up to a suitable temperature before you plant your seeds.
If you decide to wait, you can lift the cell insert at one end and pour the water into your solid cell plastic tray after planting your seeds. The water will wick up into your growing medium
Planting In Your Growing Medium
Fill your seedling cell tray with your growing medium about 2/3 full. Leave room for covering the seeds with more medium. Usually only a 1/4″ is needed.
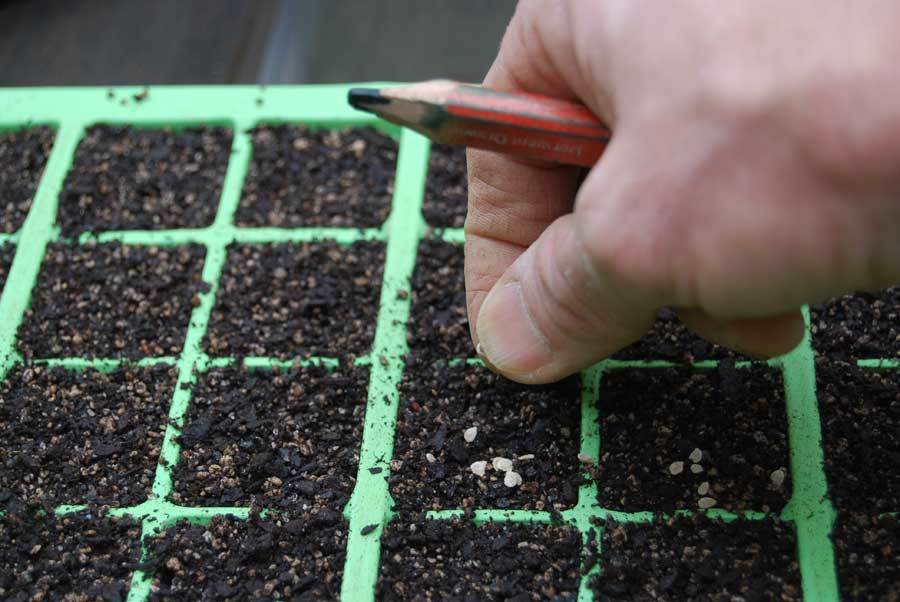
Place about 3 seeds per cell. When they sprout you can thin them down to one seedling. Selecting the strongest looking plant to survive. This ensures success for each cell in the event some seeds do not germinate.
Gently press on the seeds to make sure they are making firm contact with the soil. You can also use the end of a wooden object, like the blunt, flat end of a pencil or another wooden or plastic end, to press (but not crush) your seeds on to the growing medium so they do not stick to your fingers.
Then, put about a 1/4″ or so of your growing medium over the seeds. Spray the cells with a little water to get them started. Keep them moist during the germination stage but it is not necessary to drown them.
The Paper Towel Method
Another method during the germination stage is to cover the seeds with 1/4″ of the growing medium. Then, cover them with paper towels. Spray the towels with water to moisten. You may have to do this twice a day during the germination process. Leave the seeds covered with the paper towels.
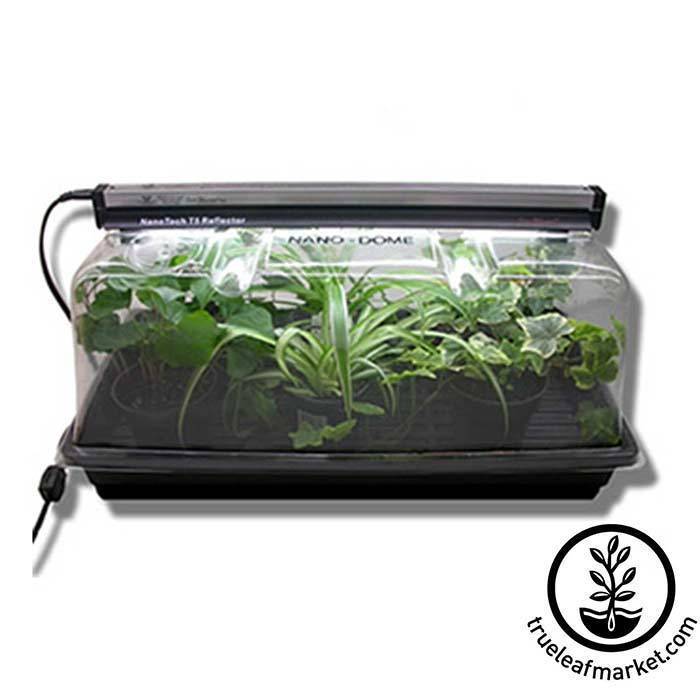
Place your dome on the tray to retain heat. If too much moisture is accumulating in the dome you can move it to the side to allow some moisture to escape.
During germination, light is not critical. More important is moisture and temperature. Enough moisture and the right temperature and your seeds should germinate in about two or three days depending on what you are trying to grow- usually the packet will give you some indication of germination time.
Once, the seeds germinate and are up you can remove the towel. At this point. you can turn on your grow light for plant growth.
You don’t have to worry about watering too much as the medium will wick the water up from the growing tray. Just refill the solid tray when it gets too low, which you can determine by lifting and peeking.
One last point, fertilization is not really an issue. Seeds carry their own nutrients. Fertilization can actually burn up the plant, so to speak, with too many nutrients. This also includes transplanting into the soil. Don’t over-fertilize there as well.
If you do use any fertilizer dilute it to about 1/3rd it’s strength with water.
Placing markers to know what is planted where is also recommended as you may lose track with a bigger variety of seedlings.
Once your seeds are planted and watered with a little spray, cover the tray with your vented dome to keep them a bit heated which encourages germination.
Lighting and Sunlight
As mentioned above, light is not a big issue during the initial germination period. Once germinated, light becomes important.
If you are using a T5 grow light, then you won’t have to worry about sunlight. It is best to use a timer for consistency and convenience. Set it for about 18 hours a day.
A grow light also allows you flexibility in location of course. Another reason for grow lights is that sunlight can sometimes be too intense and burn your seedlings up rather than grow them.
If you have sunlit areas indoors which you can use that get adequate lighting, then be sure you flip your trays daily so that they don’t bend in one direction towards the light. This should not be a concern with a grow light.
Outdoor Growing
If growing your seedlings outdoors, protect them from varmints like squirrels and birds with a portable green house. Otherwise, when they reach their most optimal state, you will look outside and discover that some squirrel or rabbit just snipped off your entire row in one fell swoop.
Also, if you have more severe weather or to protect against such, you can anchor your portable greenhouse with some rope and stakes- just in case.
Watch your temperatures with outdoor growing as you don’t want your seedlings burnt up or killed off by a cold night before you get a chance to plant them.
When to Transplant
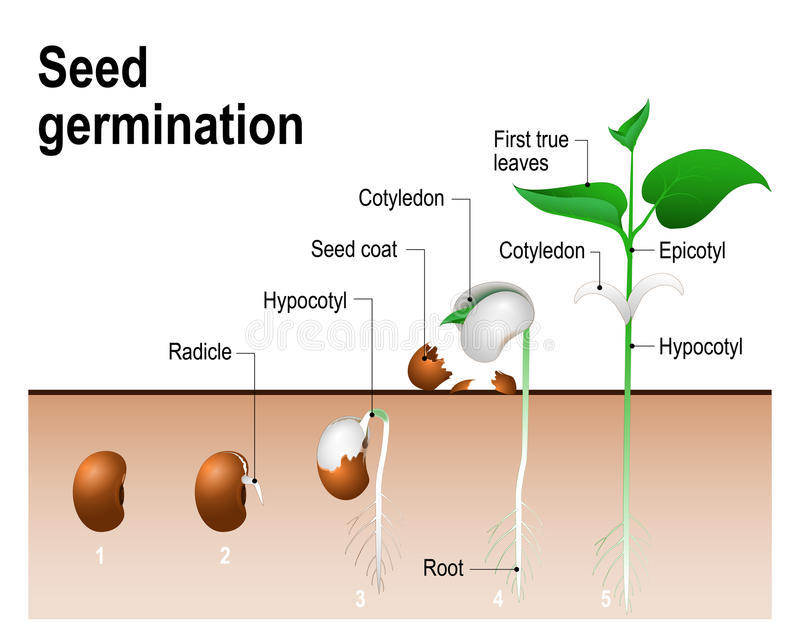
Transplant time can be tricky. The first leaves that arise in a seedling are called cotyledons. See the picture here for how a bean seed germinates.
The second set of leaves are the first set of true leaves. You normally don’t want to plant until the true leaves appear.
Another way of gauging when to plant is when the height of the plant is about four times the diameter.
For example, if you are planting in a 72 size seedling cell your diameter is about 1.5″. Multiplied by 4 that equals about 6″. Translated into a transplant time that would mean the best time to transplant would be when the plant reached about 6″ in length or height.
If the seedlings grow quickly, you can transplant them sooner. Keep an eye out for roots rising from the medium the seedling is in which would be an indication of a pot bound plant.
Producing Your Own Seeds
Assuming your seedlings developed well and you have a nice harvest coming. To acquire seeds for next season, allow about 10% of your crop to go to seed.
Capture the seeds. Allow them to dry on a porous surface, like a kitchen towel or paper towel until bone dry. When bone dry, they can be put in a cellophane baggie and stored over the winter in an air tight containers out of the light.
Jewelry box containers are good for this purpose. Even glass jars with the little silicon bags to keep moisture from triggering sprouting growth. Store in a darkened and dry location.
That should about do it for the seedlings. Most importantly, all of the controllable factors like quality, variety, light, growing medium, temperatures, watering and transplanting are all handled by you. You make the choices and control the environment.
This is your baby from start to the table. Make the right choices and it will not only be fun but also very healthy for you and your family. Good seedling starting. Let me know how you make out. Feel free to comment below.
Related Posts
Is Holistic Oral Care a Forgotten Part of Your Natural Health Treatment Plan?
Should You Take Drugs to Cure COVID-19?
Free Survival Nutrition Course – 8 Hours Plus PDF
What’s For Dessert? Superfood Fudge
8 Common Herbs With Amazing Health Benefits
Four, No-Cost, Natural Life Hacks for Creating a Healthier Emotional State
Wall Street Journal Investigation Finds Dumpster Trash Food and Supplements Being Sold as New
Tackling Obesity Begins with Awareness and Ends with Action


